How to Fix a Dripping Faucet in 8 Steps
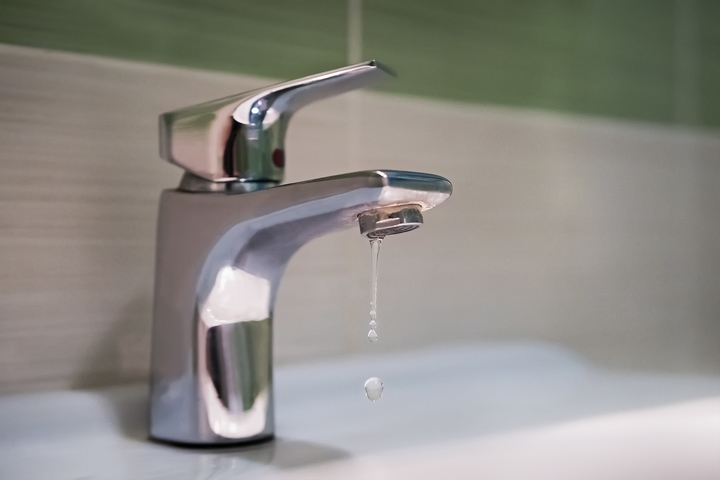
Do you hear the relentless sound of falling water droplets from your leaky faucet? A dripping faucet can be a major source of annoyance, as each persistent drip disturbs your home with its hollowing echo. With every trickling droplet, it can waste a significant amount of water and increase your utility bills. You will want to fix a dripping faucet as soon as possible.
There are many reasons why a faucet might drip. You could have a corroded seal. The faucet components might also give in to wear and tear, losing its ability to seal against the water inlet port properly. In addition, you may have mineral build-up, or some other type of foreign materials stuck inside the faucet.
Unique problems will affect specific types of faucets, increasing their probability of leakages. The good news is that a dripping faucet can be easily repaired by a plumber or anyone with a familiar expertise. Follow these eight steps on how to fix a dripping faucet:
Step #1: Shut off the water

The most obvious way to fix a dripping faucet is to shut off the water completely. You should always make sure the water is turned off before performing any repairs. Otherwise, your house can become drenched in water, and you’ll have a much bigger problem than a mere leaky faucet.
To begin, the faucet handle should be placed in the off position. Then, shut off the faucet’s water supply, using the knob underneath your sink. This disconnects your sink from the mainline, which will close the water supply and prevent further dripping.
Step #2: Determine the types of faucets

There are many different types of faucets, which may look vaguely similar, but they each carry unique characteristics. Identifying the exact type will help you troubleshoot the dripping faucet more effectively. Traditional compression faucets typically drip from the spout due to a worn-out stem washer. In this case, you’d probably want to inspect and replace the washer.
On the other hand, a cartridge faucet (single-handed and double-handed) is more likely to leak due to a worn-out neoprene seal or rubber seal along the cartridge. In this case, you’d want to inspect the seals and possibly replace the cartridge altogether.
Step #3: Locate the source of the dripping

If your faucet is leaking around the base of the spout, you probably have a worn-out O-ring underneath the spout assembly. However, it can sometimes be difficult to pinpoint exactly where the faucet is dripping from. In many instances, you may need to disassemble the faucet for a closer look. Unless you’re very familiar with the various components, contact a local plumber to help you fix a dripping faucet.
Step #4: Disassemble the faucet

To disassemble your faucet, you’ll first want to remove any decorative caps or pieces on the handles, which should pop off with a little prying. This will give you access to the handle’s screws. Then, remove the faucet handle(s) by detaching those screws, and pull up the handles. You might need to use some spray oil to loosen any corroded handles.
Next, remove the cartridge or valve stem. The technique used will vary based on the faucet type. You might need to unscrew a brass valve stem. Some stems pop right off, while others need to be twisted. Alternatively, you might only need to pull out a plastic or brass cartridge assembly without any tools.
Step #5: Inspect the faucet parts

With your faucet successfully disassembled, take care to inspect each part for corrosion, damage, or worn-out components. Take a close look at the rubber washers, O-rings, or the rubber seals of the faucet. These are used to seal the spout and keep water from leaking. Any deteriorated parts may be the likely source of a dripping faucet.
Step #6: Replace any damaged faucet parts

Once you identified the problem, it’s time to fix the dripping faucet. Head to your local hardware store with the damaged parts and purchase suitable replacements. If you own a unique or old faucet, certain parts may be more difficult to find. In this case, you can order a specific repair kit from your faucet manufacturer, allowing you to replace any old components with newer parts.
Either way, make sure that your replacements are identical to the old plumbing parts. An exact fit is critical to fix the dripping faucet completely.
Step #7: Clean the faucet parts

To prevent further leaks, clean any scale buildup that might have accumulated on the faucet’s inner parts. This mineral buildup can interfere with the faucet’s sealing ability. Soak the faucet parts in vinegar for a few minutes to return the brass to a shiny, operational condition. Then, rinse away the debris with water, using a scrub pad for stubborn spots.
Step #8: Reassemble the faucet

After a deep cleaning, you can reassemble the unit again, reversing the previous steps. Turn the water back on and check to ensure the leak has stopped. If the faucet is still dripping, your unit is possibly too corroded and has numerous leaks coming from multiple components. In this case, it might be easier and more affordable to replace the entire faucet altogether.
Like everything else in your home, faucets have an end of life. After about ten years, age can get the best of your faucet and you may consider a replacement. Contact Caldwell Plumbing for a professional assessment of your plumbing situation.


