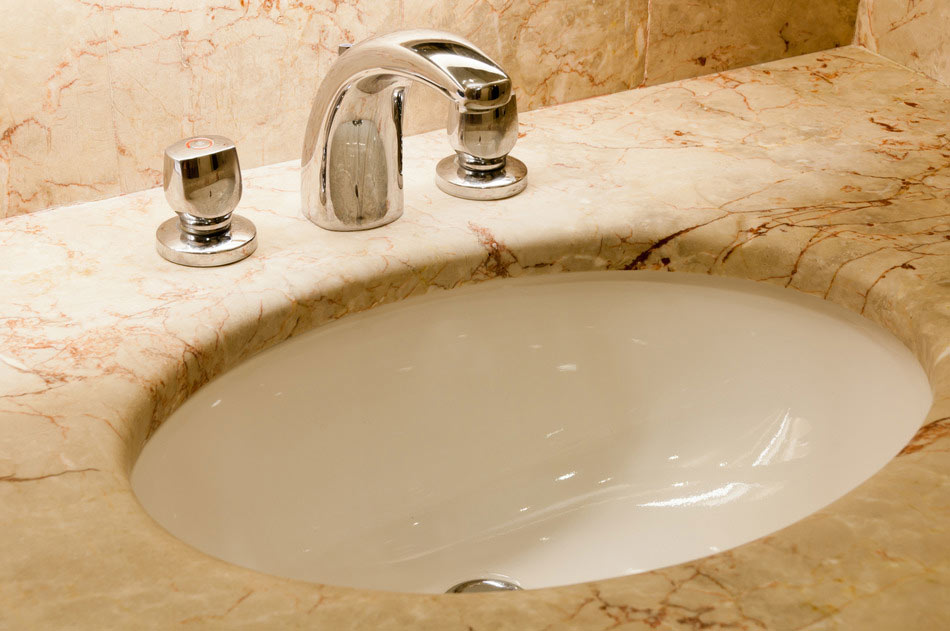
In last weeks blog article we talked about bathroom faucets and how to choose the right one for your bathroom. Now that we have chosen the best faucet for the job we will go over the steps on how to install your new faucet. In this article we will focus on the widespread faucet.
Step 1: Install The Shank
The first step is to insert the shank of the faucet through the centre hole in the deck of the sink (If you want to use one of the other holes you may also do so as the setup can be custom). Prior to inserting the spout shank make sure that o-rings are placed between the spout shank and the sink deck. If o-rings were not provided with the faucet you can also use plumbers putty. Also, if you are installing the widespread faucet into a new sink deck you may notice that there are no holes available. In this case you will have to drill the holes yourself to the size recommended by the manufacture ere.
Step 2: Secure The Shank
Once inserted you now want to secure the spout shank to the sink deck. To do so you will have to tighten the mounting nut on the underside of the sink deck. Some of the widespread faucets also come with a open retainer fitting. In this case you want to inset that this fitting goes between the sink deck and the mounting nut prior to tightening the mooting nut. To make this process easier on your self you may want have another set of hands help ensure that the spout stays facing forward as well as centred.
Step 3: Insert The Valves To The Deck
Secure a mounting ring with plumbers putty to the sink deck hole and then insert the valve from the underside of the sink through the hole. Once through you will snap a temporary clip into place to secure the valve momentarily. This is one of the most common methods for inserting the valves into the the deck. Some manufactures, however, may have a different method for this step so check with them first. Regardless of the method a second set of hand will also be beneficial during this step.
Step 4: Secure the Valves
From the underside of the sink thread the mooting nut onto the valve to secure it into place on the sink deck. Before securing you want to make sure that the cold water valve is on the right side and your hot water valve is on the left side. To determine which is valve is which you can look inside the cartridge, blue is cold and red is hot. To secure the valve use an adjustable wrench to tighten the nut onto the valve. When fully tightened you need to make sure that the water outlets are pointing at the inlet in the spout shank.
Step 5: Attach Supply Tubes
In the majority of cases these tubes will be suppled with the faucet that you purchased. In the rare case that they are not you will have to pick some up at your local hardware store. To attach the tubes to the valves you will simply twist and turn the tubes overtop of the water outlets on the valves. The other end of the supply hose will be attached to a t-fitting that then attaches to the water inlet on the spout.
Step 6: Attach Supply Risers.
The supply risers are made up of flexible braided metal and are secured to the water stop valves by twisting them into place. To ensure a proper seal make sure you apply some teflon tape to the valve before tightening.
Step 7: Attach The Spout
Take the spout and set it neatly onto of the spout shank which is coming through the top of the sink deck. Using the supplied hex wrench tighten the faucet into place. This is the most common way to attach the spout and of course may differ between brands. Check the manufactures instructions to ensure proper installation.
Step 8: Attach Faucet Handles
For this step you will have to check with the manufacture on how to properly install the handles. Since they are all different you want to make sure you secure this properly. When attaching make sure that the final tightened position of the handles is oriented in the way that symmetrically balances the look of the faucet.
Step 9: Test the Installation
You are now ready to turn on the water supply to the faucet and check it functioning properly. Let it run for 20 seconds to flush out any debris that may be in the lines.
If you have any additional questions regarding this project please contact us. If you would like Caldwell Plumbing to install a widespread faucet for your you can schedule an appointment today or get a fee estimate for the project.


