Pop-up drains are a very easy way to stop water in your sink. Once installed it allows you to simply press on the top of the drain to open and close the flow of water out of the sink. In todays DIY article we are going to go over the steps on how to install a pop-up drain in your sink.
Step 1: Remove The J-Trap
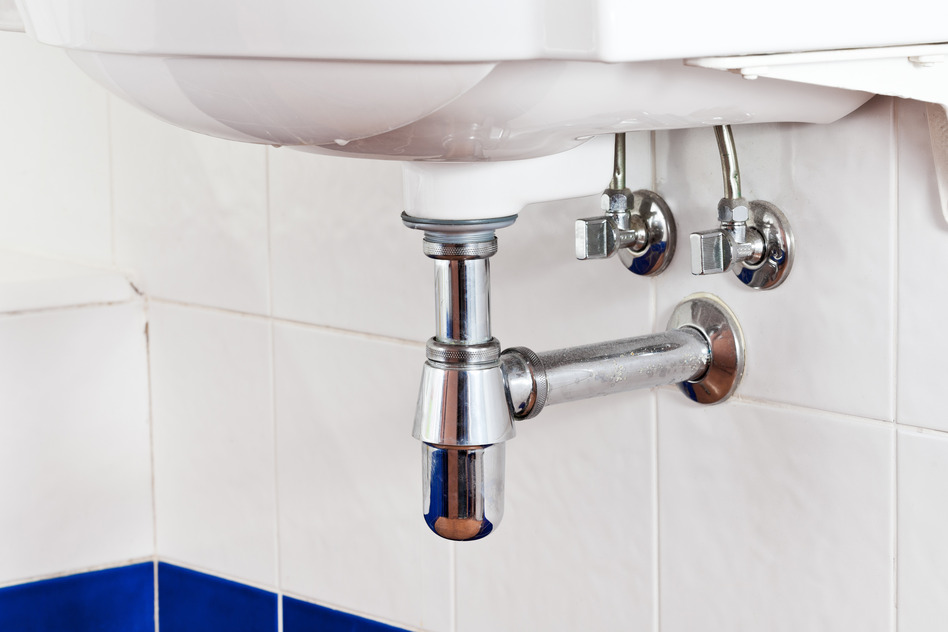
Before you start the process of removing the J-Trap you will want to place a bucket under the trap to catch any water. Once the bucket is in place you can then loosen the lock nuts that hold the J-Trap in place. After the nuts are loosened you should be able to slide the J-Trap off of the tailpiece.
Step 2: Detach The Pivot Rod
Next you want to unscrew the cap that holds the ball and pivot rod on the body and then pull the rod out. Once our you can compress the spring clip and then remove the pivot rod from the clevis.
Step 3: Remove The Pop-Up Body
You can start by simply prying the pop-up stopper from the stopper body. Then, from underneath, you can remove the lock nut that is on the stopper body which will allow you to push up on the stopper body. Now you should have the ability to remove the stopper body and flange.
Step 4: Prep The New Stopper Body
Start out by first cleaning above and below the drain. Once completed you will want to wrap 3 layers of teflon tape around the the tread of the new stopper body. Make sure that you are wrapping the tape in a clockwise motion. Now thread the locknut all the way down onto the new pop-up body, followed by a washer and then a rubber gasket. Lastly you want to apply a bead of plumbers putty to the bottom side of the drain flange.
Step 5: Installing The New Stopper Body
Guide the new stopper body through the top of the sink hole and then, from underneath, pull down on the stopper body to set the flange. Thread and then fully tighten the locknut/washer onto the stopper body (Do not twist the flange as it will break the seal of the plumbers putty). Clean off any access plumbers putty around the flange, a flat head screw driver will work well for this.
Step 6: Install Pivot Rod
Insert the long end of the pivot rod into the clevis with the spring clip and then insert the ball end of the pivot rod into the pop-up body opening and into the stopper stem. Screw the cap over the ball and onto the pop-up body.
Step 7: Reassemble J-Trap
The last step is to simply reassemble the J-Trap connection underneath the sink. Once completed turn on the tap to test the installation while the bucket is still in place. Check all seals to ensure no leaks and you are done.
Alternatively if you would like to Caldwell Plumbing to complete this installation for you feel free to schedule an appointment with us today. We service Ajax, Pickering, Whitby, Oshawa, Uxbridge, Scarborough, Bommanville, Courtice, Durham Region as well as Toronto and the GTA. If you have any questions regarding this DIY project get in touch with us, we would love to answer them for you.


