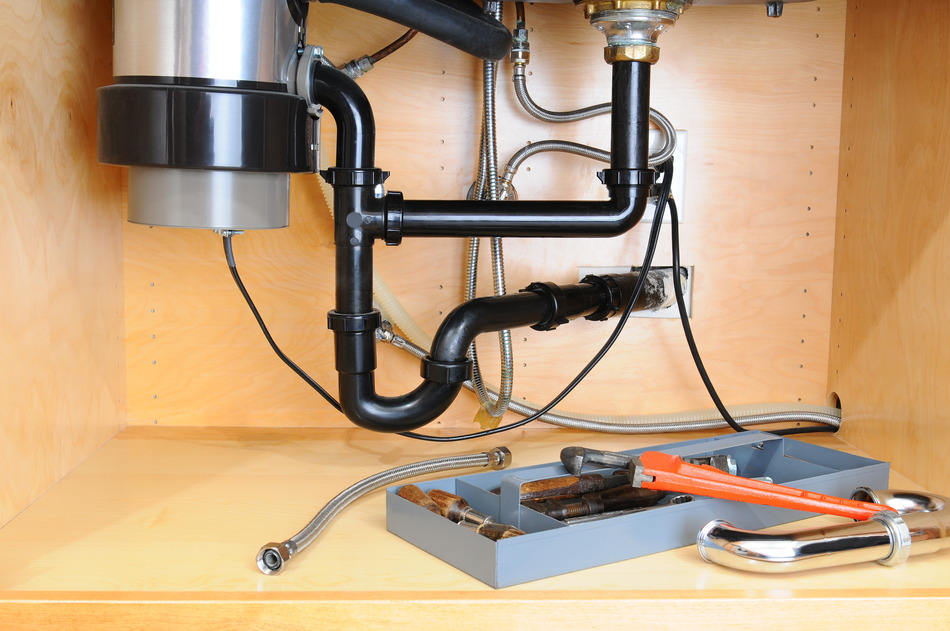
In our last blog article we talked about how to choose the right food disposer for your kitchen. Now that you have choosen a food disposer that meets the needs of your house hold you now need to install it. In today’s article we will be guiding you through the steps in how to install a food disposer. This is the first part to a two part series. The second part will be posted next week on our blog.
Step 1: Remove the Old Disposer
This step only applies if you already have an older food disposer installed in your kitchen. If you do not already have one then you can skip to step two.
Before you start you are going to want to shut off the electrical power at the main service panel. Once the power has been cut off you can go ahead and disconnect the traps as well as the drain pipes by using a wrench to loosen the lugs. Some disposers come with their own special wrench so you will need to locate it if this is the case. TIP: If you are taking on this project by yourself you may want to get a solid object to place under the old disposer before removing it to make things easier.
Step 2: Clear The Lines
Before you can begin the installation steps of this DIY project you will need to clear the drain lines. Remove the trap and the trap arm and then clear the lines all the way to the branch drain.
Step 3: Disassemble The Mounting Assembly
You now want to take the new mounting assembly and disassemble it in order to install it to the sink. At this point you will also remove the snap ring from the sink sleeve.
Step 4: Install Sink Sleeve
Take some plumbers putty and lay it around the perimeter of the drain opening. Then take the sink sleeve and place it into the sink opening and press down into the putty.
Step 5: Install Fiber Gasket and Backup Ring
After the sink sleeve has been installed you now want to make your way to the underside of the sink. Here you will slip the fiber gasket over the sink sleeve, that you installed in step 4, followed by the backup ring. Make sure the backup ring is in the same position as it was prior to disassembling it in step 3.
Step 6: Install Upper Mounting Ring
Place the upper mounting ring over the sink sleeve and hold into place the mounting ring, finer gasket, and backup ring. While holding in place slide the snap ring onto the sleeve until you feel and hear it lock into place. Once in place you can then line up the openings in the mounting ring, thread the screws in by hand and then tighten them with a screwdriver.
Step 7: Connect The Electrical
Now you are ready to install the disposer part of the system, but before you do that you want to make all of your electrical connections. Double check that you have shut off power to this area via the service panel. Remove the access panel placate from the disposer and attach the white wire from the electrical box to the white wire inside the disposer using a small plastic wire cap. You will also want to follow the same instructions to connect the black wire. After the caps have been attached you may want to wrap it with electrical tape, just to make sure the connection is secure. Lastly attach the ground wire (green) from the box to the grounding terminal of your disposer.
That is all for now. Stay tuned to next weeks blog article: How to Install a Food Disposer – Part 2. In the meantime if you have any questions in regards to this project please contact us. Alternatively if you are looking to have Caldwell Plumbing do this project for you you can schedule an appointment with us today or you can even get a free estimate to install your food processor.


