This article is part 2 of the two part series on how to install a food disposer. If you haven’t already, please check out the first part of this article here. Now, lets continue on with this DIY plumbing project
Step 8: Knock Out The Plug
Important: If you do not have a dishwasher then you want to skip this step.
Take a screwdriver and place it into the disposer port. Then take a rubber mallet and knock up the plug.
Step 9: Install the Disposer
Now you are ready to install the disposer. To do so hang it from the mounting ring that was previously installed by lifting it into place and aligning the mounting ears are aligned with the screws on the mounting ring and then turn the disposer to secure it into place. Do not lock it into place just yet, we will do this after we install the plumbing hookups.
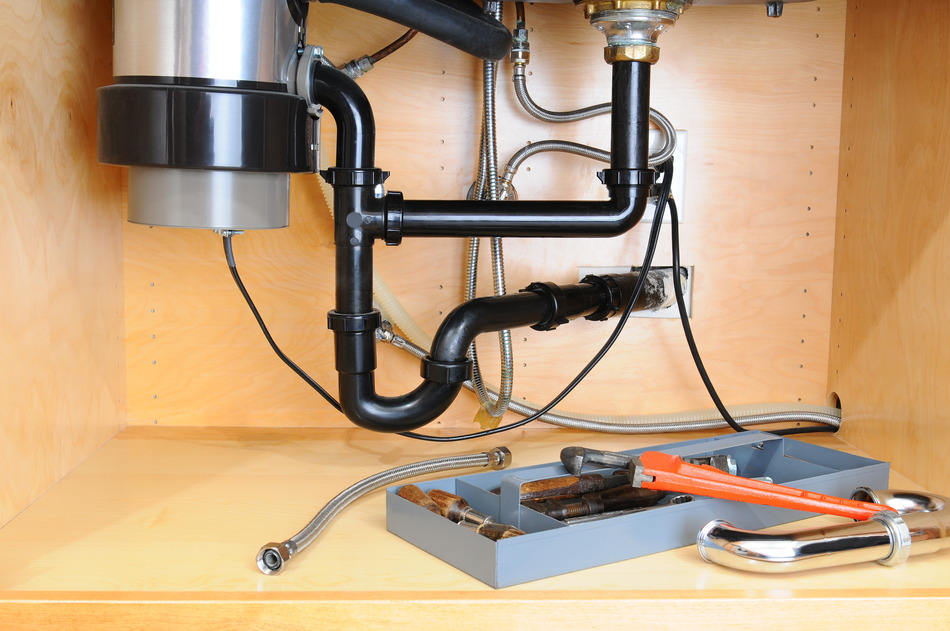
Step 10: Attach A Discharge Tube
With the disposer serculy in place you now want to attach the discharge tube to the disposer. Before doing so you want to check the manufactures instructions to insure this is done to specification. Keep in mind that you also want to have a good seal to ensure that the unit will not leak. Using a screwdriver tighten the screw from the discharge tube to the disposer.
Step 11: Attach The Y-Fitting
The Y-fitting should be sized to allow acceptance from two sources, the disposer and the other sink. You may need to adjust the sinks pluming in order to get from the p-trap opening to the opening of the y-fitting. Place the Y-fitting over the drain stub out.
Step 12: Install The Trap Arm & P-Trap
Install the trap arm by place one end of it over the open port of the y-fitting. Next, take the P-Trap and alighn one end of it over the newly installed y-fitting and make sure that the other end is aligned with the bottom of the disposer discharge tube.
Step 13: Attach Disposer to P-Trap
Situate the food disposer in a manner that aligns the bottom of the discharge tube with the open end of the p-trap. Make sure that they will fit together without issue and that the discharge tube doesn’t extend to far down the p-trap. If it does you will need to make a line on the p-trap where it will fit the disposer discharge tube correctly and cut on that line with a hacksaw. On the flip side of things, if there is a gap between the p-trap and disposer discharge tube you will need to install an extension in order to make the two connections meet. Once you have your p-trap and discharge tube aligned you can then attach the two by sliding a washer and a slip nut over the fittings and tighten.
Step 14: Connect The Dishwasher Tube
Now you want to connect your dishwasher to the food disposer. To do this you will take the dishwasher discharge tube and slide it over the inlet port located at the top of the food disposer. You can connect the two using a hose clamp and tightening it with a screwdriver. Not all units will come with this connection and it may need to be purchased separately.
Step 15: Lock The Disposer Into Place
We avoided doing this in step 9 but we are now ready to go ahead with this. Prior to doing this you will want to test the unit to make sure that everything is functioning properly and there are no leaks. If there are leaks now is when you want to check your work and fix the problem. Once you have everything in working order you can now lock the food disposer into place by turning tightening the mounting lugs until it make con act with the locking notch.
You are done! You have now just installed your food disposer. Of course if you are having any issues related to this install you can contact us here at Caldwell Plumbing to some assistance. Alternitivly you can schedule an appointment with us to do the install for you and you can even get a free estimate to install the food processor.


